
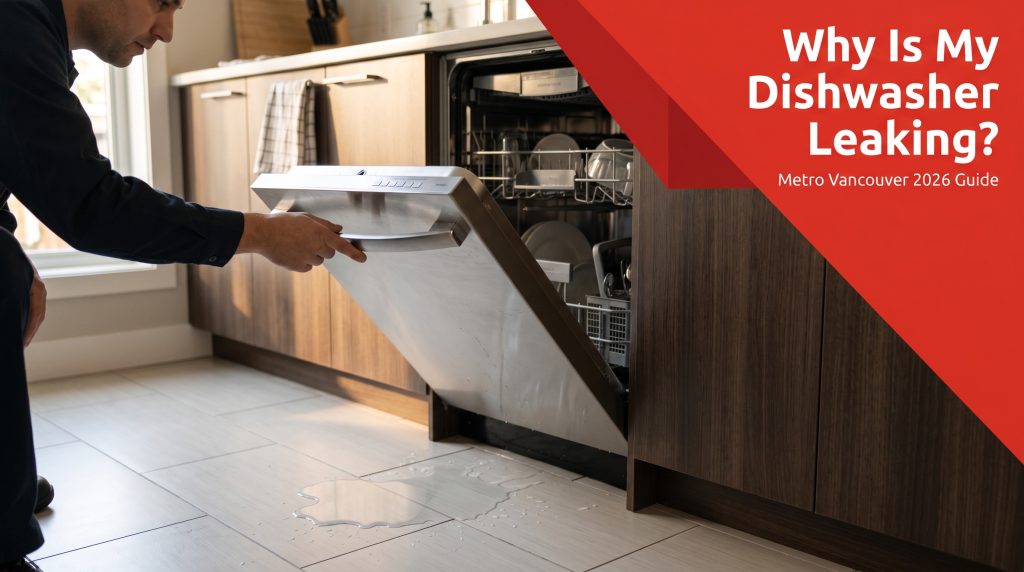
Why Is My Dishwasher Leaking? 5 Common Causes and What to Check
In this guide
A puddle at the toe-kick is usually not the disaster it looks like. Dishwasher leaking from bottom almost always traces back to one of five parts, four of them are common wear items, and most leaks can be diagnosed in under 20 minutes with a flashlight and a towel. This guide walks through how to find the source, what each cause actually means, and when to escalate to a professional dishwasher repair visit. If the leak is active right now, shut the water supply valve under the sink first, then come back to this page. To skip the troubleshooting, book a service visit and we will diagnose it on the first call.
The bottom of the unit is where every leak path eventually shows up, even when the failure is higher inside the cabinet. Water follows gravity, so a torn gasket at the top of the door, a cracked spray arm in the tub, or a slow drain hose drip behind the unit all end up under the dishwasher. Reading the puddle pattern is how a tech narrows down the cause before pulling the unit out. With a few simple checks you can usually do the same thing yourself.
Start here, where is the water actually coming from
Before guessing at parts, look at when the leak appears. The timing tells you almost everything.
- Leak only during a wash cycle. Likely a door gasket, a spray arm, or a tub seal failing under pressure.
- Leak only during the drain phase. Likely the drain hose, the drain pump seal, or a kinked drain line behind the cabinet.
- Slow drip that appears overnight when the unit is idle. Likely the water inlet valve, the supply line, or the float switch stuck open.
- Water appears immediately when the door is opened mid-cycle. Usually splash, not a leak. The door gasket may be slightly compressed or the unit may be overloaded.
Dry the area completely, run a short rinse cycle, and watch where the water shows up first. That single observation cuts your diagnosis time in half.
Did you know?
The most common cause of a slow dishwasher leak in Metro Vancouver homes is not a worn part, it is mineral buildup. Hard water leaves scale on the door gasket, the spray arm seals, and the drain check valve. Within three to four years of normal use the gasket loses its compression seal, and the unit starts leaking even though every part is technically still functional.
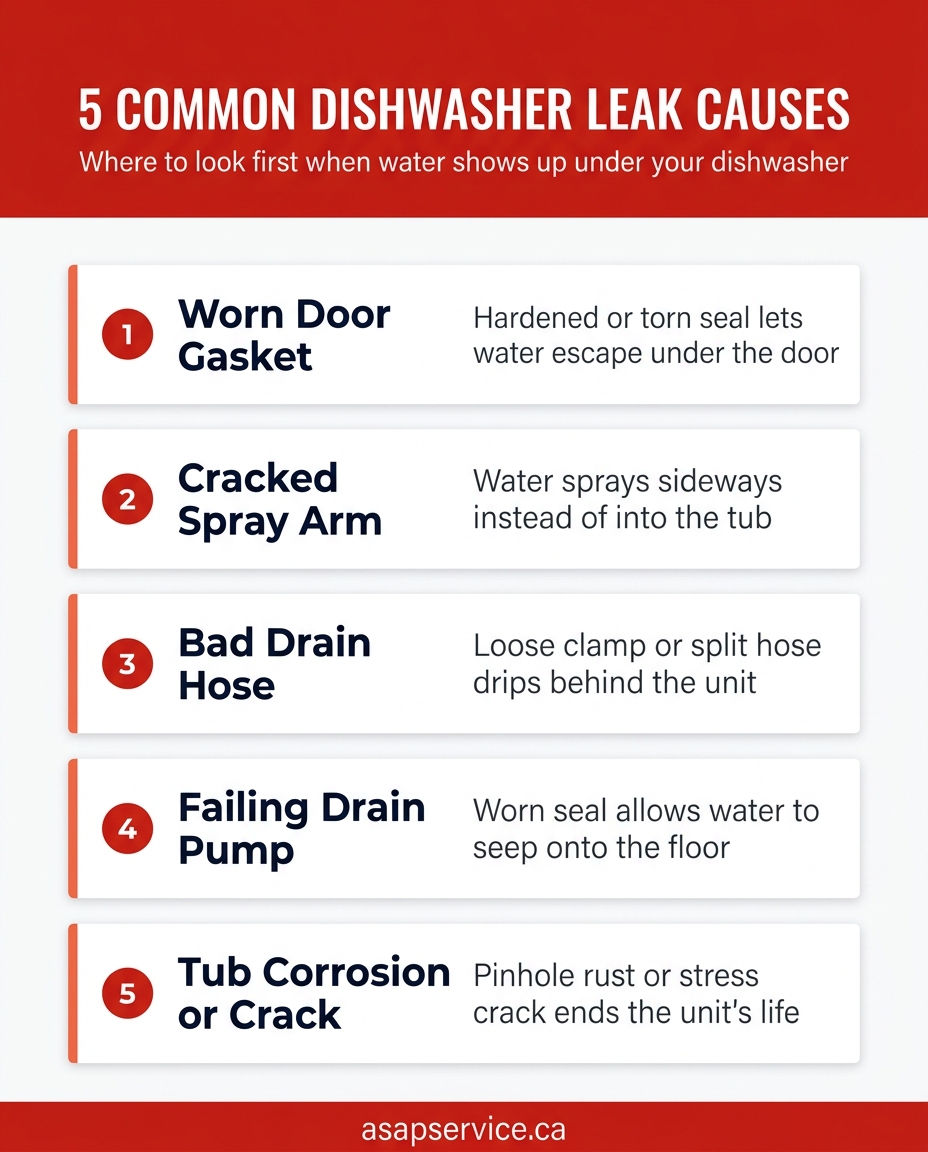
The five most common leak causes
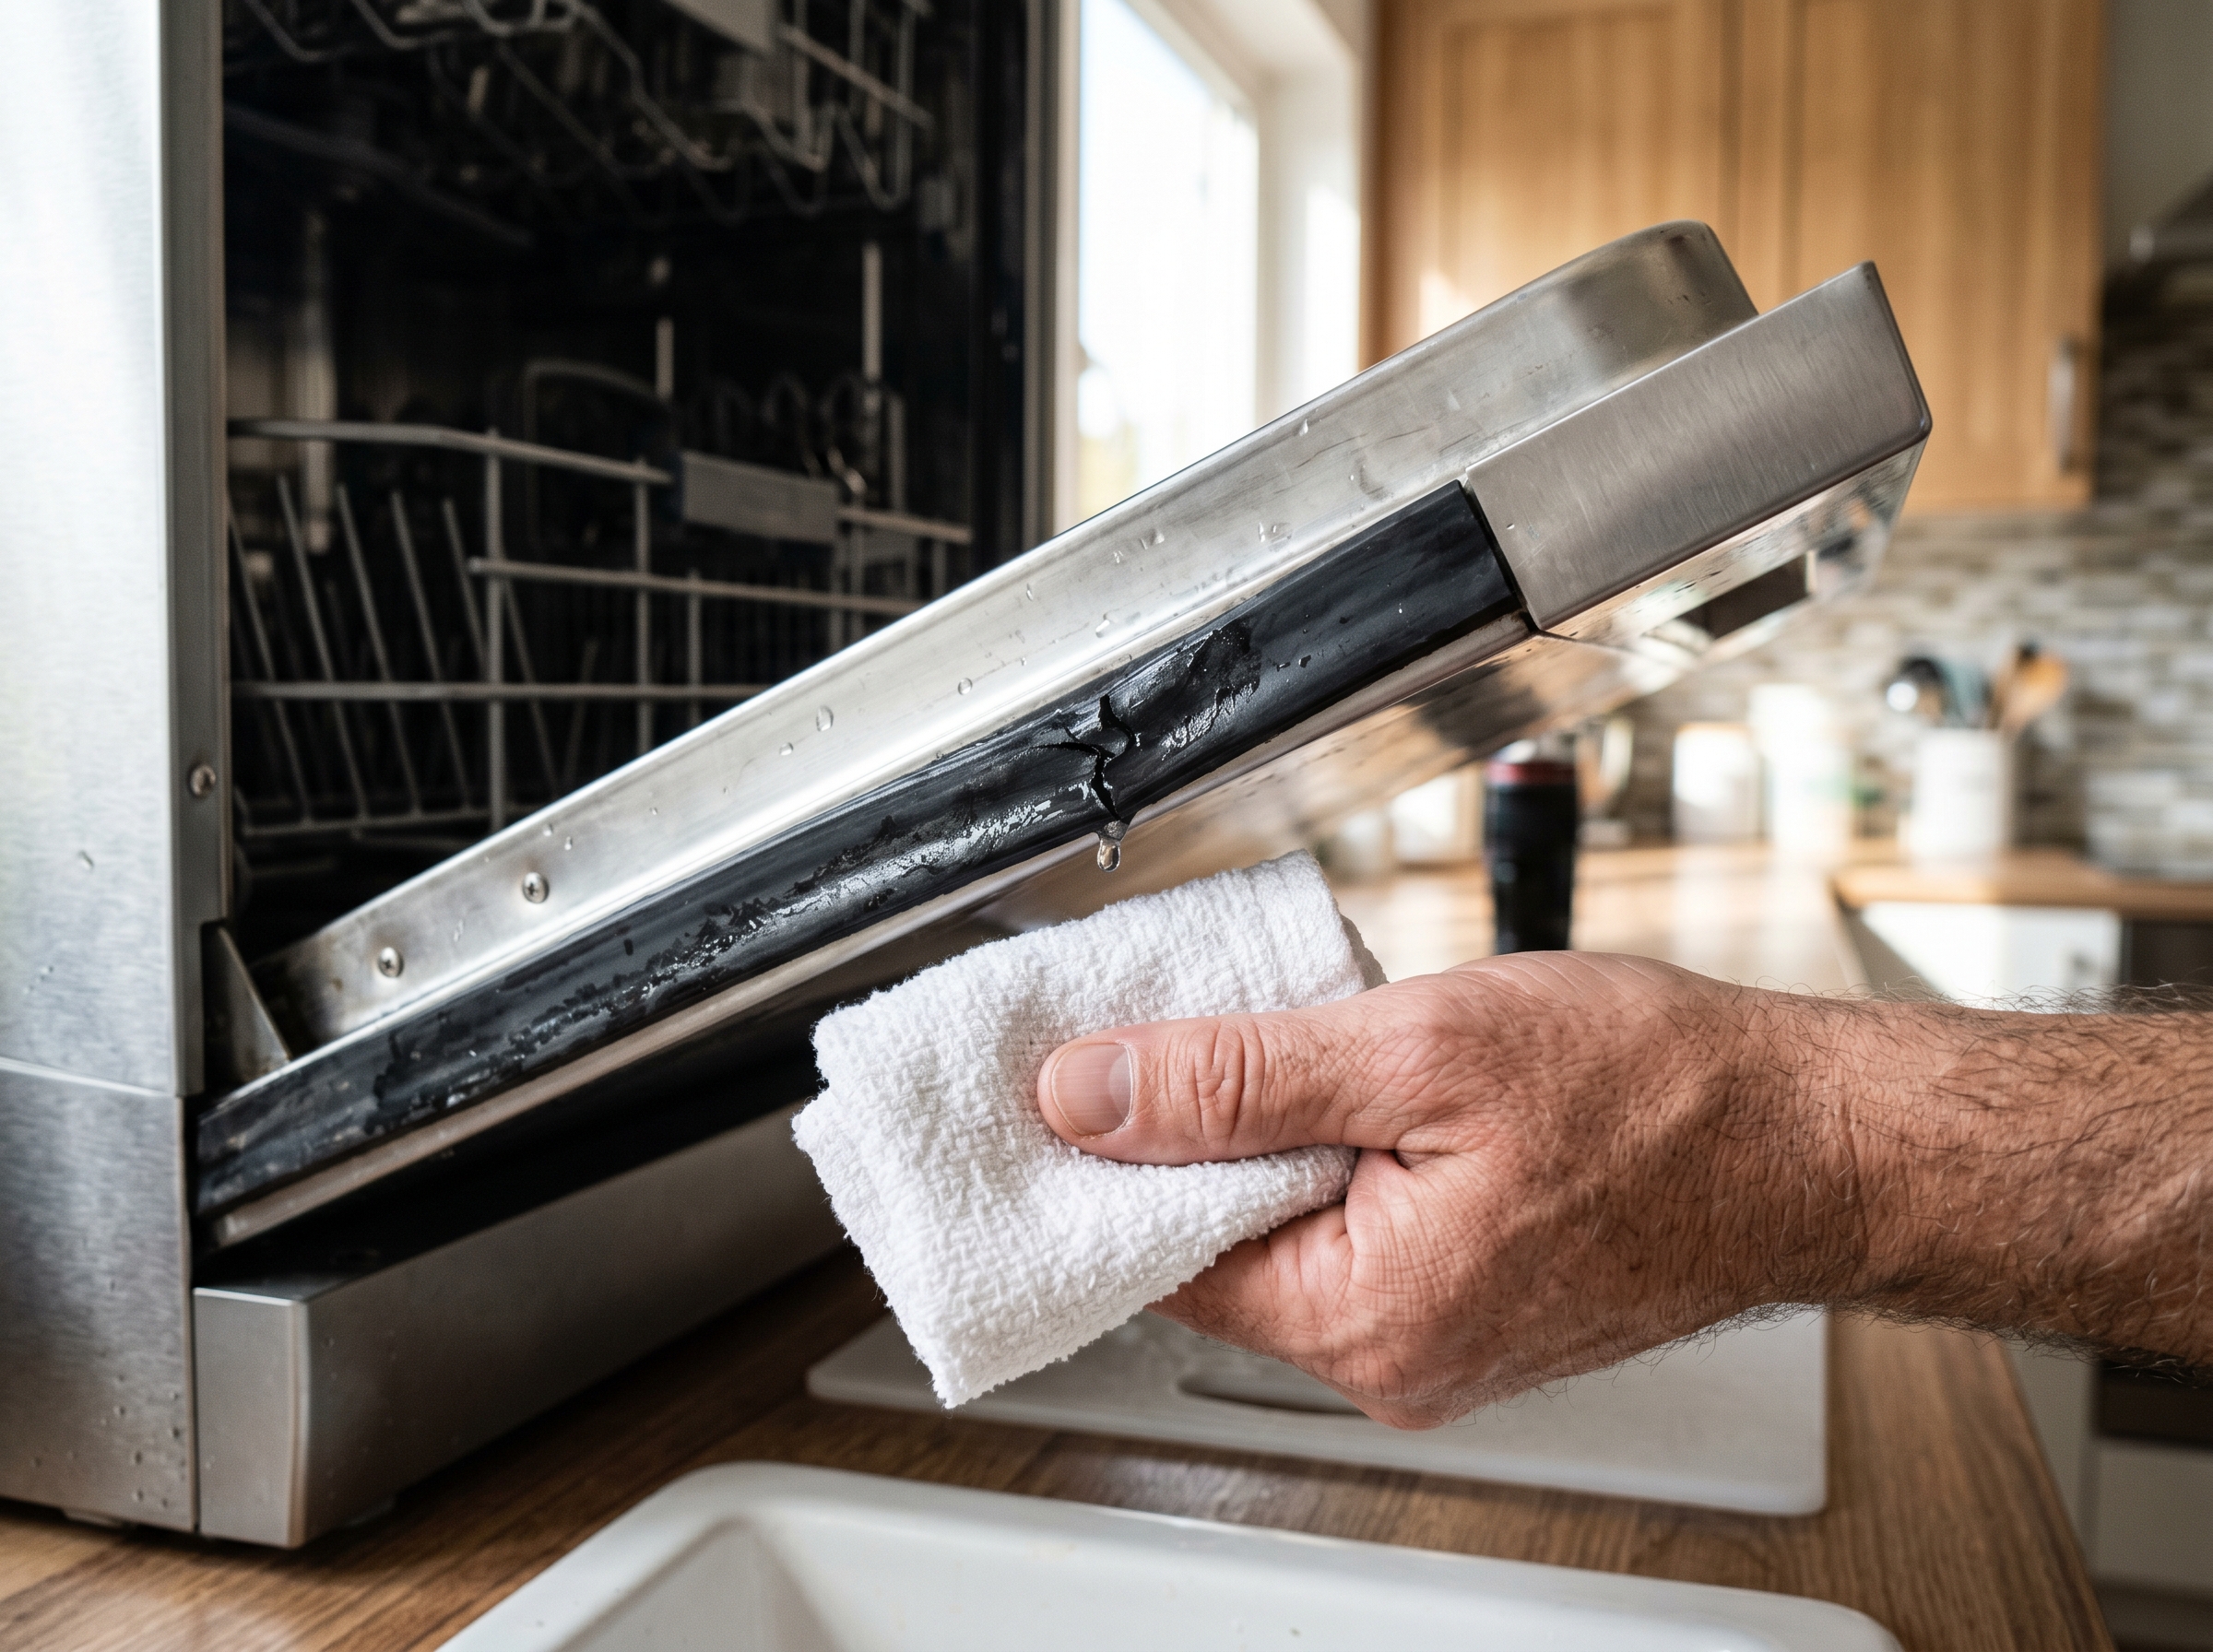
Worn door gasket
The rubber seal around the door is the number-one leak source we see in service calls. Over four to six years of daily use the gasket hardens, cracks at the corners, or compresses unevenly. Water then escapes under the door during the wash cycle and pools on the floor in front of the unit. Visual signs include a flattened section of rubber, visible cracks, or food residue baked into the seal. Replacement is straightforward on most brands and runs $40 to $90 in parts.
Cracked or loose spray arm
The lower spray arm rotates and shoots water in a controlled pattern. If a tine cracks, a hub fitting loosens, or a piece of cutlery jams the arm, water sprays sideways instead of up into the tub. That sideways spray hits the door gasket from the wrong angle and pushes water past the seal. Pull the lower rack, lift the spray arm off its post, and inspect the underside for cracks. Replacement arms run $25 to $80 depending on brand.
Bad drain hose connection
The drain hose runs from the back of the dishwasher up to a high loop, then down to either the garbage disposal or a separate sink drain branch. A loose hose clamp at either end, a kinked section behind the cabinet, or a split in the hose itself causes a leak that only appears during the drain phase of the cycle. Symptoms include water at the back of the unit or visible drips under the kitchen sink during drain. The high loop being installed wrong, or missing entirely, is also a common cause of slow drainage and intermittent leaks.
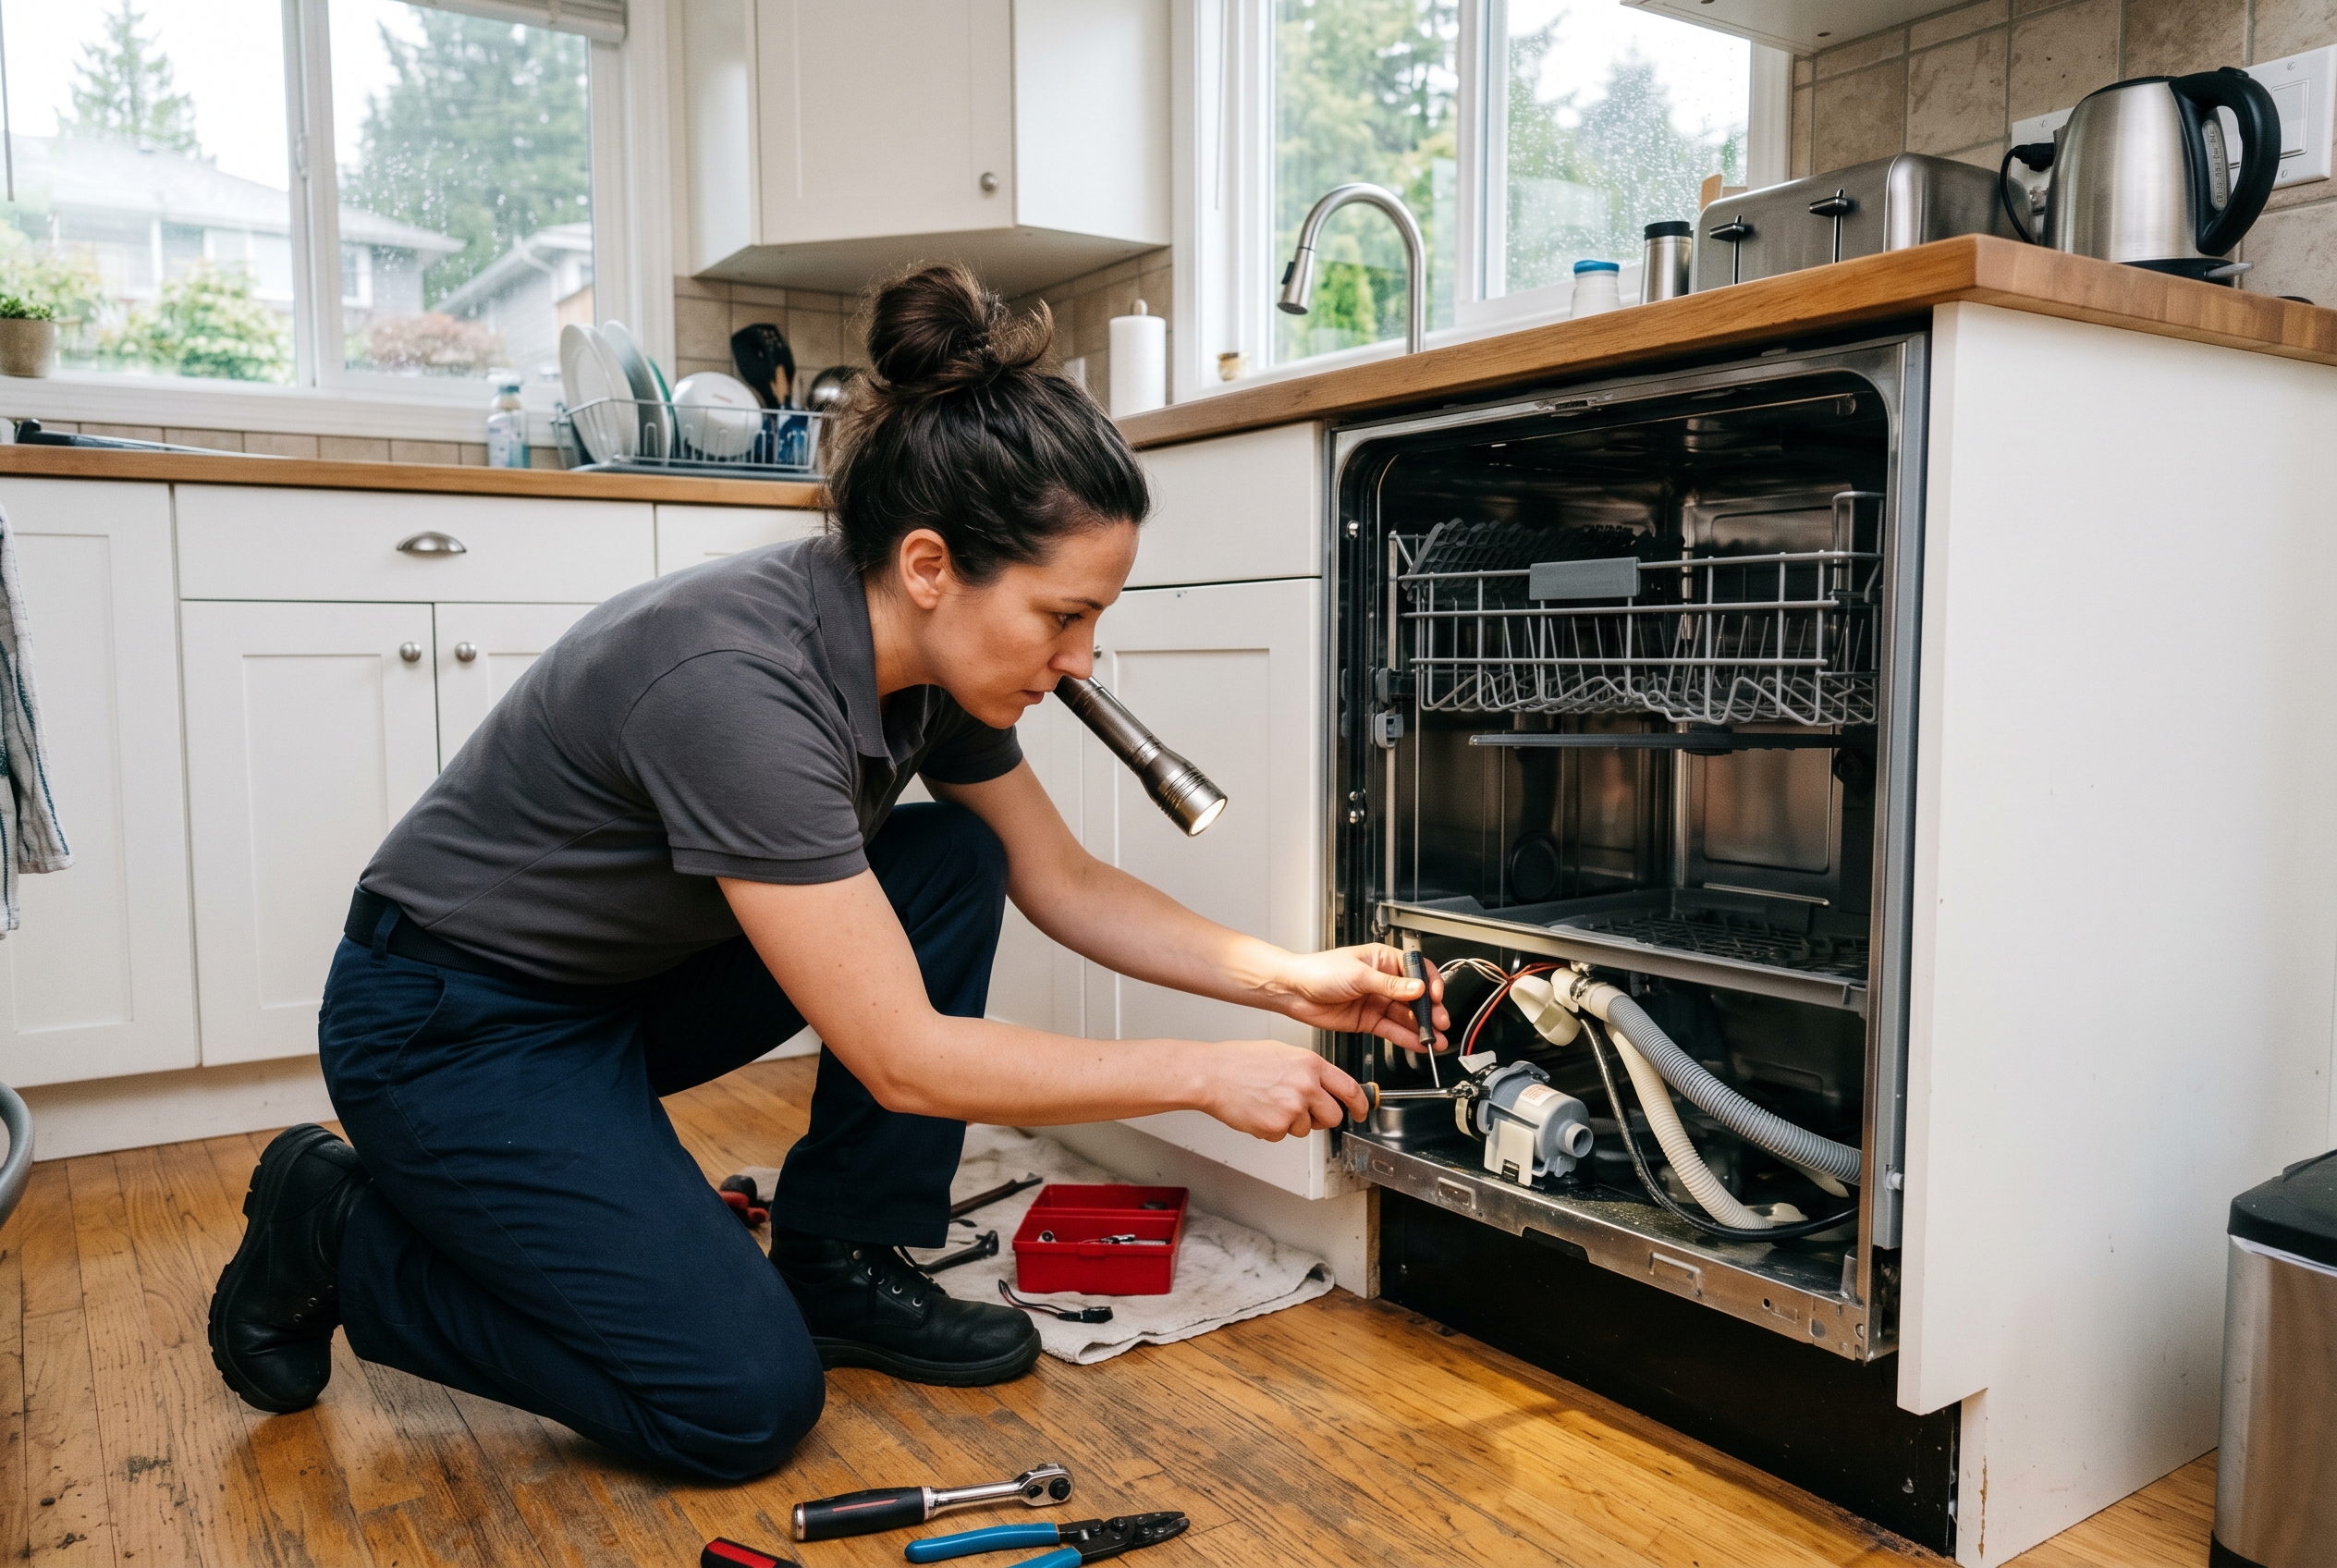
Failing drain pump seal
The drain pump sits at the bottom of the dishwasher and pushes water out through the drain hose. The shaft seal that keeps water from leaking out around the pump motor wears down over time. When it fails, water seeps out of the pump housing onto the floor of the cabinet, then dribbles out at the toe-kick. This is the leak that appears at the front of the unit specifically during the drain phase, never during wash. A failed pump seal usually means replacing the entire pump assembly, $90 to $220 in parts.
Tub corrosion or hairline crack
The last and most serious cause. Stainless steel tubs rarely fail this way. Plastic tubs, used on lower-end and many older units, eventually develop stress cracks or pinhole leaks, particularly around the heating element mount or near a corner weld. A leak from the tub itself is a unit-life-end conversation. The repair is rarely worth doing on a unit older than eight years because the labour cost exceeds replacement value. If you have a plastic tub and an ongoing slow leak that nobody has been able to locate, this is often the answer.
Pro tip
Before you call for service, place a folded white paper towel along the bottom front of the cabinet at the toe-kick, run a short rinse cycle, and watch where the towel gets wet first. Front-left, front-right, or front-centre wetness each point to a different leak source. A tech who arrives to that observation can skip 15 minutes of diagnosis and get straight to the part. It is the cheapest piece of troubleshooting you can do.
First checks any homeowner can do
The five checks below solve the leak in roughly half the cases we attend in Vancouver and the GVA. They take maybe 30 minutes total and require no tools.
- Check the door gasket all the way around. Open the door, look for cracks, hardened sections, or food residue. Press the rubber gently, it should feel pliable, not stiff. Wipe with warm soapy water and re-check.
- Make sure the unit is level. A dishwasher that has settled forward in the cabinet will leak even with a perfect gasket. A small bubble level on the bottom rack tells you in seconds. If it tilts forward, the front feet need to come down or the rear ones up.
- Inspect the spray arms. Pull each rack, lift each spray arm off its post (a quarter turn on most brands), and check for cracks, missing tines, and free rotation. Spin each one by hand to confirm it moves without binding.
- Check the drain hose high loop. Open the cabinet under the sink and look at where the drain hose comes up from the dishwasher. It should rise to the top of the cabinet, attach with a strap or clip, and then come back down to the disposal or drain. No high loop, or a high loop that has slipped down, causes intermittent leaks and drainage problems.
- Confirm the inlet valve is not leaking. Close the dishwasher door, wait for the unit to be idle for at least an hour, then look behind the toe-kick with a flashlight. Any water there with the unit idle points at the inlet valve or the supply line, not a wash-cycle component.
When to stop troubleshooting and call a tech
There are four scenarios where homeowner troubleshooting stops being worth the time, and a service call saves money in the long run.
- You see water with the unit completely idle and no clear source under the sink. The water is coming from inside the cabinet, and finding it requires pulling the unit.
- The toe-kick area is wet but no part of the door, spray arms, or drain hose looks damaged. The leak path is internal, often the heating element gasket or a tub seal.
- The dishwasher trips the breaker when it runs. That is a control board, wiring, or motor issue, not a simple leak, and water with electrical is not a DIY scope.
- Your unit is under manufacturer warranty. Any opening of the cabinet by a homeowner generally voids that warranty. Have authorized service handle it.
Our dishwasher repair team attends most Metro Vancouver service calls within 24 to 48 hours and stocks the common gaskets, pumps, and spray arms for major brands on the truck. That means most leak diagnoses turn into same-visit repairs.
Save your money
If your dishwasher is over 10 years old and the diagnosis points at the drain pump, the tub, or the inlet valve, get a quote on both repair and replacement before deciding. Major repairs on older units often run 40 to 60 percent of the cost of a new mid-range model. A new dishwasher with a five-year warranty and meaningful efficiency gains is sometimes the smarter capital decision. We will tell you the honest math at the time of the service call.
What dishwasher leak repairs cost in Metro Vancouver
The prices below are 2026 Metro Vancouver figures from independent appliance repair shops for the common dishwasher leak repairs. They cover parts plus labour and assume access is normal, the unit can be pulled out from the cabinet without cabinet damage, and there is no flood remediation required.
| Repair | Parts | Total with labour |
|---|---|---|
| Diagnosis only, no repair | n/a | $110 to $160 |
| Door gasket replacement | $40 to $90 | $180 to $280 |
| Spray arm replacement | $25 to $80 | $160 to $260 |
| Drain hose or clamp repair | $15 to $50 | $160 to $240 |
| Drain pump replacement | $90 to $220 | $260 to $440 |
| Water inlet valve replacement | $50 to $130 | $220 to $340 |
| Tub crack repair or seal | $60 to $150 | Not usually recommended on 8+ year old units |
Download the dishwasher leak diagnosis checklist (PDF)
A printable one-page checklist covering the five leak causes, the first checks for each, and the questions to ask before authorizing repair.
People often ask: can a leaking dishwasher cause flooring damage?
Yes, and the damage often appears weeks after the leak starts. Engineered hardwood and laminate flooring under and around the cabinet swell when exposed to repeated moisture. By the time the visible puddle reaches the kitchen floor surface, the subfloor has often already taken on water. If you see warping, lifting edges, or musty smells near a dishwasher, do not delay diagnosis. Read more about other dishwasher symptoms worth catching early.
Preventing future leaks
Most leak causes are wear items, not random failures. You can extend the life of every gasket and seal with three habits that take about five minutes a month.
- Wipe the door gasket after the last wash of the day. Mineral scale and food residue degrade rubber faster than water itself. A weekly wipe with a damp cloth doubles the gasket life on most units.
- Run a vinegar rinse every two months. Place a cup of white vinegar in the upper rack and run an empty hot cycle. This dissolves scale on the spray arm fittings, the heating element, and the drain check valve.
- Check the drain hose annually. Pull the cabinet at the toe-kick or look under the sink and verify the high loop is in place, the clamps are tight, and the hose is not pinched. Five minutes once a year prevents the drain-phase leak entirely.
Safety notice. Always disconnect power at the breaker before working on any wired component of a dishwasher. Water and electricity together are dangerous. If you see arcing, smell burning insulation, or notice the dishwasher tripping the breaker, do not run the unit until a licensed technician inspects the wiring and any affected component. ASAP Appliance Repair is not liable for damage, injury, or warranty voiding from DIY repair attempts. Consult the manufacturer service literature for your specific model before opening any cabinet panel.
Sources and references
- Government of Canada, consumer product safety guidance for home appliances
- Natural Resources Canada, ENERGY STAR Canada dishwasher program
- BC Hydro, PowerSmart residential energy and water guidance
- Metro Vancouver, regional drinking water program and hardness data
Frequently asked questions
ASAP Appliance Repair has serviced dishwasher leaks across Vancouver, Richmond, Burnaby, Surrey, and the rest of the GVA since 2007. If you have already done the homeowner checks and the leak is still showing up, book a same-day or next-day service appointment and we will diagnose and repair in one visit on most jobs.